If you’re new to blogging, writing your first few posts can feel overwhelming. From brainstorming ideas to structuring content, there’s a lot to figure out. Thankfully, tools like ChatGPT can simplify the entire process. Whether you struggle with writer’s block or just want to speed up your workflow, ChatGPT is like having a co-writer at your fingertips.
In this complete beginner’s guide, you’ll learn how to use ChatGPT to write high-quality blog posts step-by-step — from ideation to publishing — without sounding robotic or generic.
Helping Bloggers offers step-by-step tutorials, tools, and resources to help beginners start and grow a successful blog using WordPress. And this guide is one of them.
Table of Contents
- Why Use ChatGPT for Blogging?
- Getting Started with ChatGPT
- Blog Writing Workflow Using ChatGPT (Step-by-Step)
- Prompt Templates for Different Blogging Tasks
- Avoiding Common Mistakes
- Real-World Examples
- Best Practices for SEO + AI
- Tools to Use Alongside ChatGPT
- Final Thoughts
- FAQs
Why Use ChatGPT for Blogging?
Before diving into the “how,” let’s address the “why.”
Here’s why beginner bloggers love using ChatGPT:
- ✅ Saves time on writing and editing
- ✅ Helps brainstorm blog post ideas
- ✅ Structures content quickly
- ✅ Offers SEO-friendly suggestions
- ✅ Can rewrite and repurpose older content
It’s not about replacing your creativity — it’s about enhancing it.
Getting Started with ChatGPT
First things first: You don’t need any special tools or paid plans to get started with ChatGPT. Visit https://chat.openai.com and create a free account.
Here’s what you need to know:
- Free vs. Paid: The free version is fine for beginners. Paid versions (like ChatGPT Plus) use GPT-4 and can offer even better responses.
- Mobile & Desktop Friendly: ChatGPT works on both browsers and mobile apps.
- No Installation Required: It’s all web-based.
Pro Tip: Use the custom instructions feature to guide ChatGPT on your blog’s tone, niche, and target audience.
Blog Writing Workflow Using ChatGPT (Step-by-Step)
Let’s walk through the full blog writing process using ChatGPT. You can repeat this for every post you write.
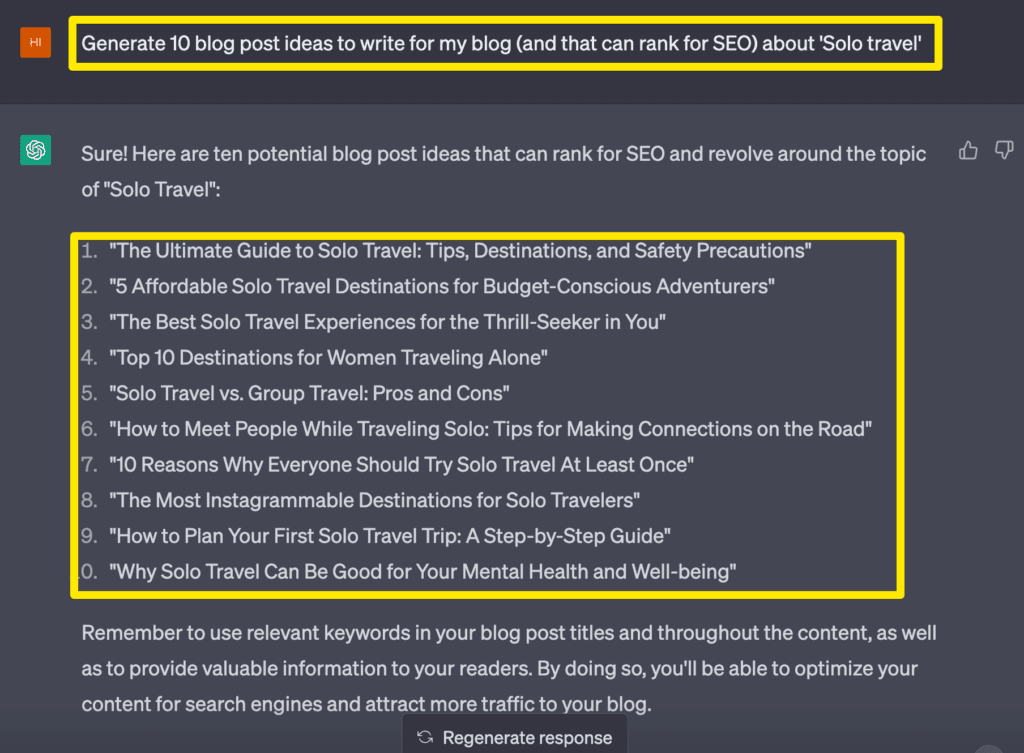
Step 1: Generate Blog Post Ideas
Prompt Example:
“Give me 10 blog post ideas for a beginner blog in the [Your Niche] niche.”
Output Examples:
- How to Start a Blog from Scratch
- Essential WordPress Plugins for New Bloggers
- SEO Tips for Beginners
Step 2: Create an Outline
Prompt Example:
“Create an outline for a blog post titled: How to Start a Blog with WordPress.”
ChatGPT will give you a structure like:
- Introduction
- Choose a Niche
- Register Domain & Hosting
- Install WordPress
- Design Your Blog
You can edit and customize as needed.
Step 3: Generate Paragraphs
Use prompts like:
“Write a 150-word introduction for a blog post titled [Blog Post Title]. Use a friendly tone.”
You can also ask:
“Expand point #3 into a 200-word section with tips and examples.”
Repeat for each section of your outline.
Step 4: Add Headings, Keywords & Subheadings
After drafting, organize your blog using:
- H2: Main sections (e.g., Introduction, Tools Needed)
- H3: Sub-sections (e.g., Free vs. Paid ChatGPT plans)
Sprinkle your keywords naturally throughout.
Step 5: Refine Tone & Style
Not happy with the tone? Use this:
“Rewrite this paragraph in a more engaging and beginner-friendly tone.”
Step 6: Optimize for SEO
You can ask ChatGPT:
“Suggest 5 SEO keywords for this blog post topic.”
Also ask:
“Suggest a meta description for this blog post in under 160 characters.”
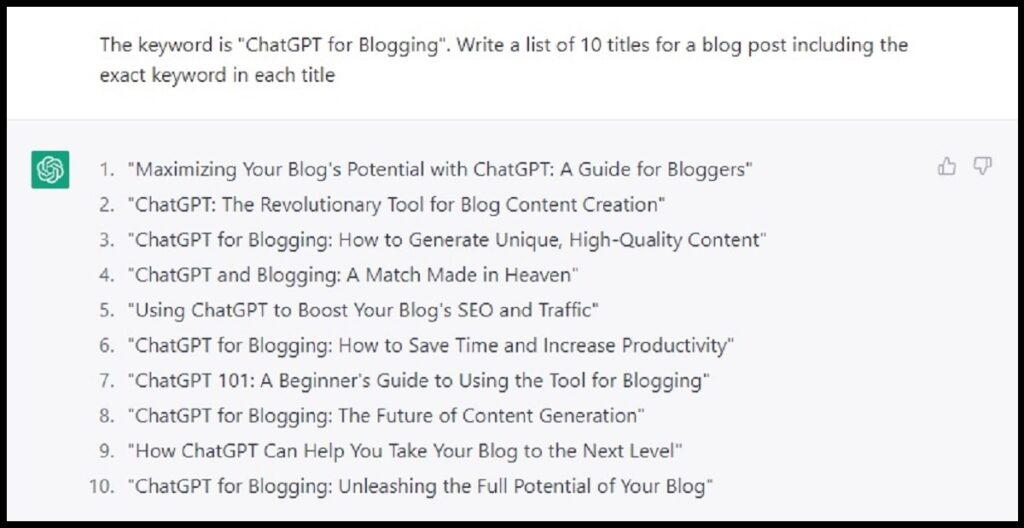
Prompt Templates for Different Blogging Tasks
Here are ready-to-use prompt templates:
Idea Generation
“Suggest blog post topics about [topic] for beginners.”
Blog Outlines
“Make a blog post outline for: [Title].”
Blog Writing
“Write 200 words on [Section Title] in a conversational tone.”
SEO Optimization
“Suggest long-tail keywords for [Blog Title].”
CTAs
“Write a call-to-action for a blog post about [Topic].”
Avoiding Common Mistakes
While ChatGPT is powerful, beginners often make these errors:
- ❌ Relying 100% on AI with no edits
- ❌ Forgetting to check facts
- ❌ Using generic tone and style
- ❌ Copying outputs without personalizing
Always add your personal stories, experiences, or commentary to make your blog stand out.
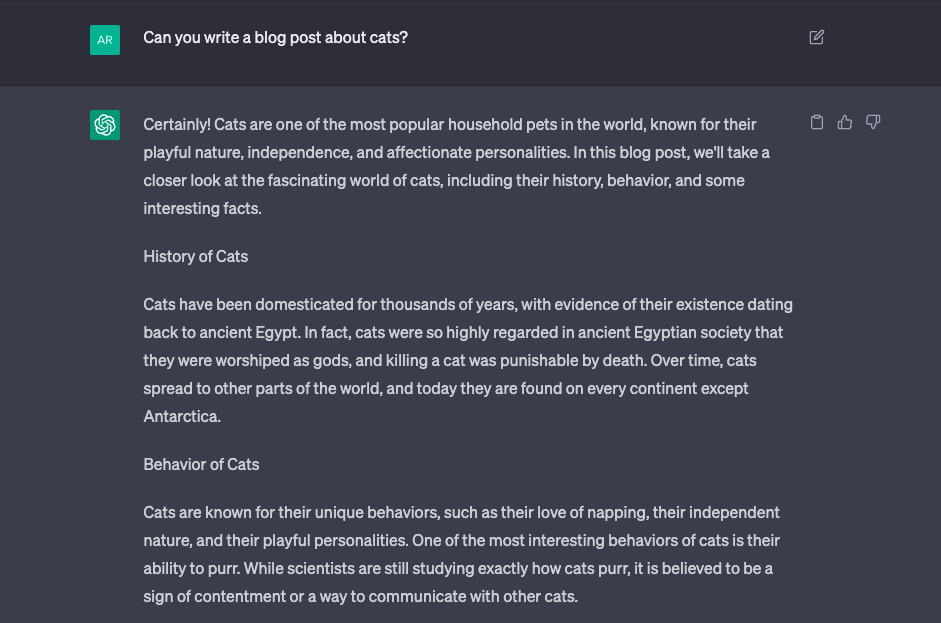
Real-World Example: From Prompt to Blog Draft
Prompt:
“Write a blog introduction about why beginners should use WordPress.”
ChatGPT Output (simplified):
“Starting a blog can be overwhelming — but choosing WordPress makes it easier…”
Your Final Version:
Add your voice, tweak for clarity, include personal insight — now you have a humanized post!
Best Practices for SEO + AI Blogging
Want to rank higher in search engines? Follow these tips:
- Use short paragraphs (2–3 lines max)
- Insert internal links to your older posts
- Use primary keyword in title, intro, headers
- Add a meta title & meta description
- Optimize image alt texts (you write those manually)
Tools to Use Alongside ChatGPT
Here are beginner-friendly tools that work great with ChatGPT:
| Tool | Purpose |
|---|---|
| Grammarly | Edit grammar & tone |
| Hemingway Editor | Improve readability |
| WordPress + Elementor | Design your blog visually |
| Surfer SEO / NeuronWriter | Optimize content for SEO |
| Canva | Create blog graphics easily |

Final Thoughts
ChatGPT is like having a helpful writing assistant by your side. For new bloggers, it can accelerate content creation, reduce overwhelm, and improve quality — but it’s still important to add your personal touch and fact-check everything.
Remember: AI is here to support, not replace, you — the blogger.
FAQ: Using ChatGPT for Blog Writing
Yes, but it’s recommended to edit, fact-check, and personalize the content before publishing.
Yes — as long as it’s helpful, high-quality, and not spammy. Google values content that helps users.